Espresso Cake Filling: A Dash of Java Joy for Your Baking
When I first discovered the joy of espresso cake filling, it was as if a delicious world opened up before me. Picture this: a cozy afternoon in my grandmother’s kitchen, the rich smell of freshly brewed coffee wafting through the air as I watched her whip up a dessert that would bring family and friends together. This espresso cake filling has since become a staple in my own kitchen, embedding itself in family memories and celebrations.
What makes this filling so special? It’s not just the rich, bold flavor of espresso that awakens your senses, but also its creamy, luxurious texture that elevates any dessert. Unlike other fillings that can taste overly sweet or artificial, this espresso cake filling strikes the perfect balance, offering a delightful coffee flavor that complements cakes and pastries beautifully.
In this recipe, I’ll share my tips and secrets to create the most luscious espresso cake filling that your loved ones will crave. Get ready to learn not only how to make this filling but also why it deserves a spot in your culinary repertoire.
What Are Espresso Cake Fillings?
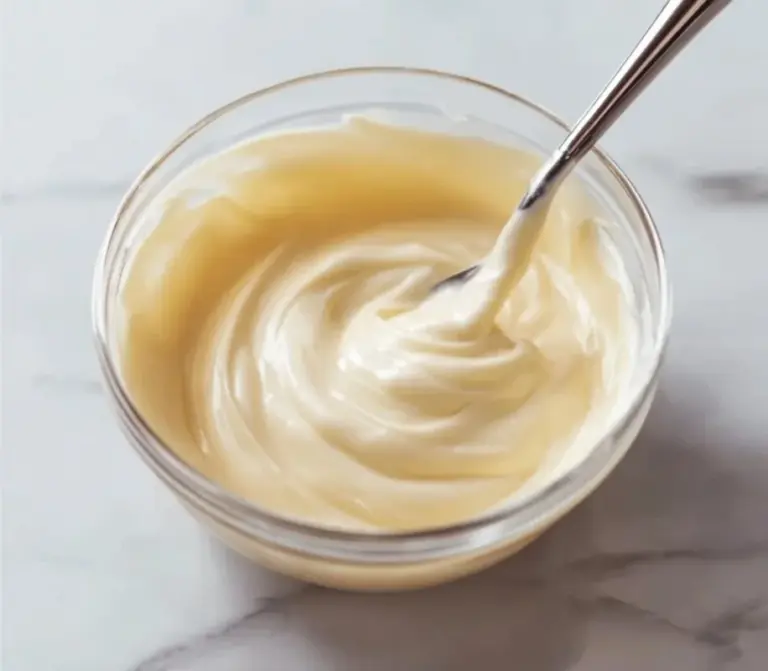
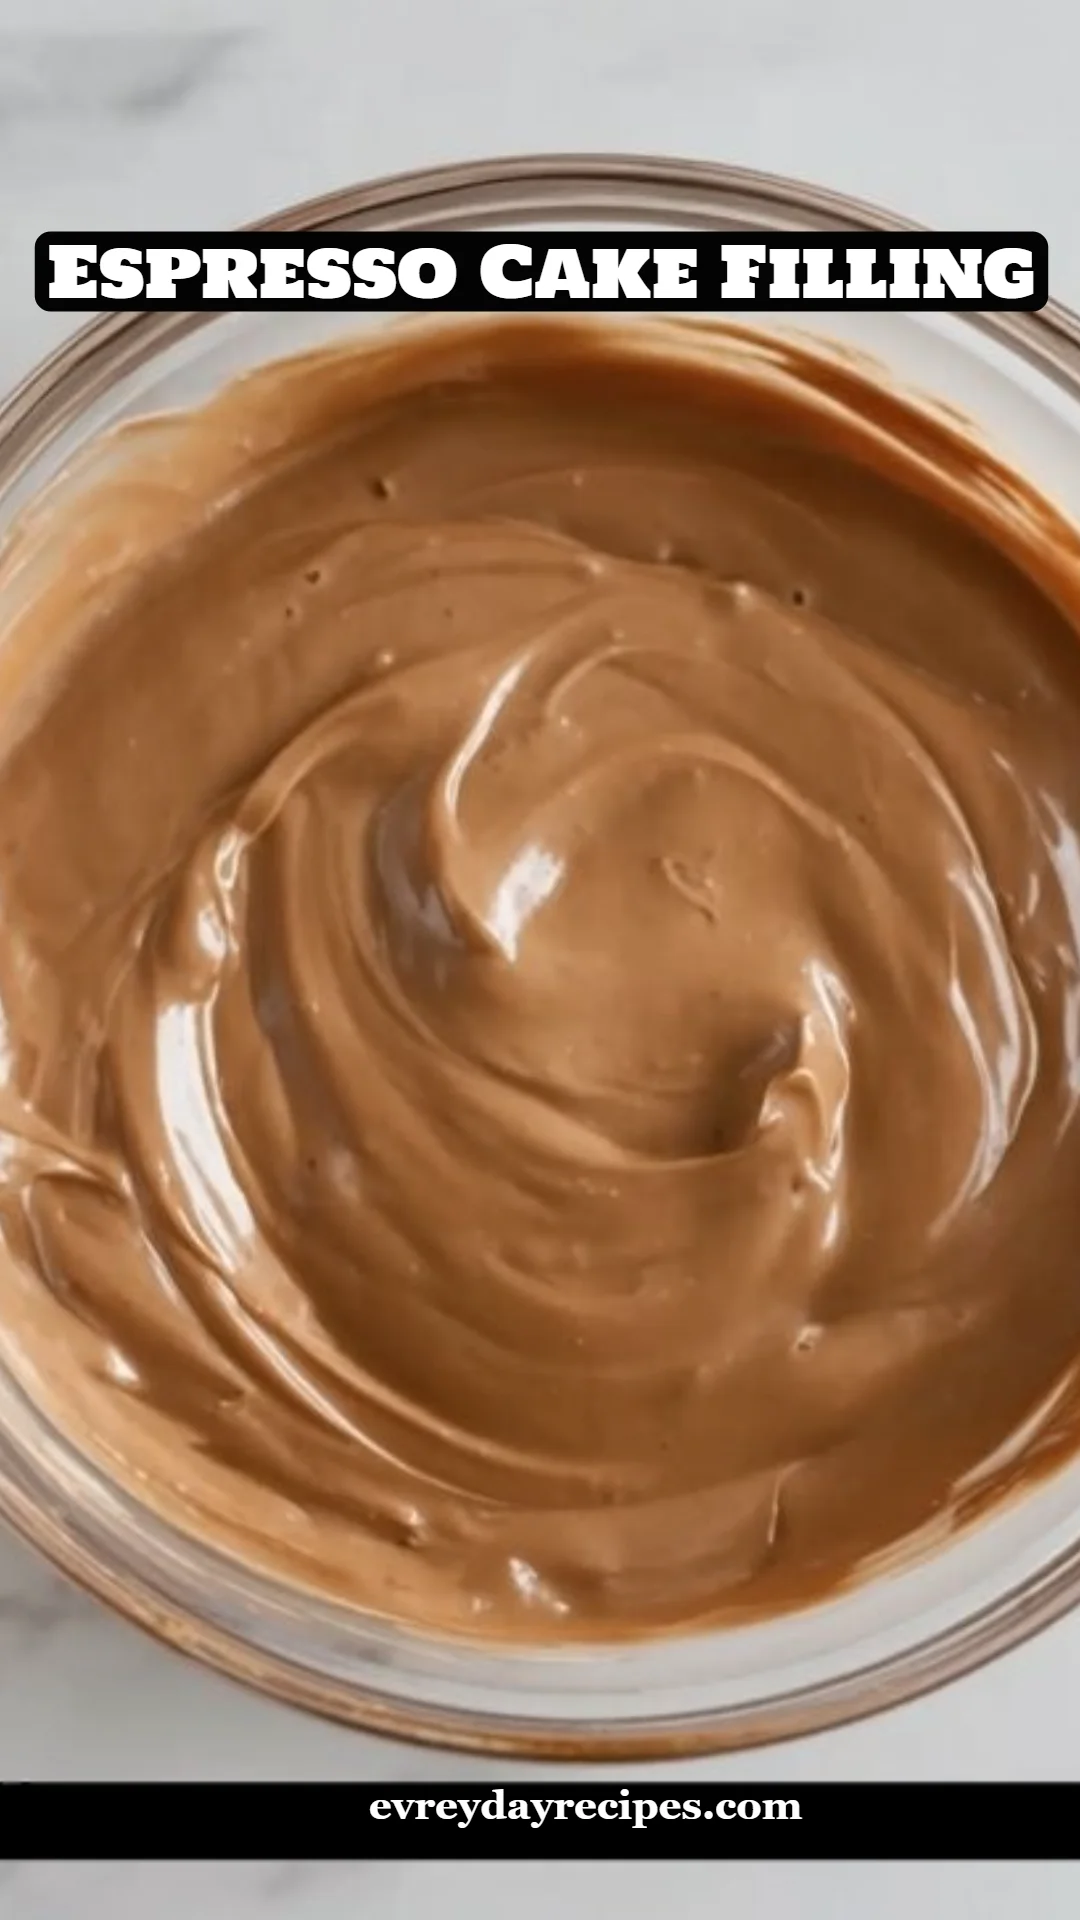
Espresso cake filling is a velvety custard-like blend that combines the richness of coffee with a creamy base, perfect for layering between cake layers or as a filling in pastries. Originating from Italian desserts that celebrate coffee, this filling has roots in traditional café culture, where sweets are often paired with the robust flavors of espresso.
The taste? Think deep, roasted coffee with a hint of sweetness that dances on your palate, combined with a silky texture that melts in your mouth. The unique elegance of this filling lies not only in its taste but also in its versatility. Whether you’re preparing a classic espresso layer cake for a birthday or a unique twist for a holiday gathering, this filling will effortlessly enhance any recipe.
I recommend reaching for this filling when you’re looking to impress at a dinner party or simply want to treat yourself to a cozy coffee-inspired dessert at home.
Why You’ll Love This Recipe
Irresistibly Flavorful: Unlike store-bought fillings that may taste overly sweet or artificial, this homemade espresso cake filling is nuanced, rich, and downright delectable.
Cost-Effective: With just a few pantry staples, you can create a luxurious filling without breaking the bank. Say goodbye to expensive dessert shops and hello to your own kitchen!
Customizable: Easily adjust the espresso intensity to match your preference. You can also add flavors like chocolate or vanilla to elevate your creations even further.
Simple to Make: Fear not, even if you’re a beginner! This recipe is approachable, and with just a bit of patience, you’ll ace it in no time.
Great Make-Ahead Option: This filling stores beautifully in the fridge and can be prepared a day in advance, making it perfect for those busy baking days.
Let’s get started on this easy recipe that will surely become a favorite in your home!
Ingredients
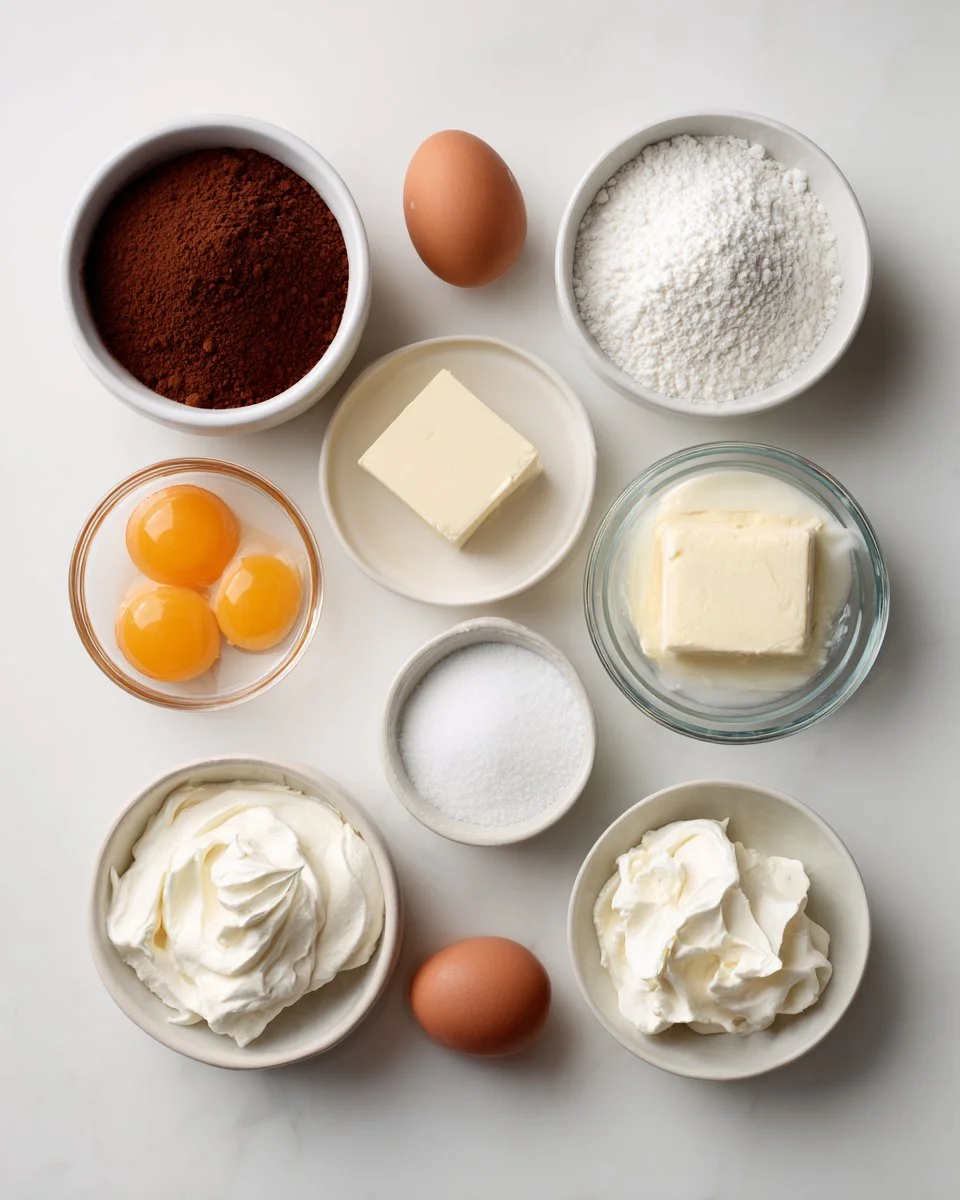
- 1 cup whole milk (using whole milk gives a creamier texture)
- 2 tablespoons instant espresso powder (look for high-quality brands for the best flavor)
- 3/4 cup granulated sugar (for sweetness that balances the espresso)
- 3 large egg yolks (room temperature for better mixing)
- 2 tablespoons cornstarch (this helps thicken the filling)
- 2 tablespoons unsalted butter (I recommend brands like Kerrygold for a rich flavor)
- 1 teaspoon vanilla extract (pure vanilla will enhance the taste)
- 1/2 cup heavy cream, whipped to soft peaks (for a light and airy texture)
| Ingredient | Substitution Notes |
|————|——————–|
| Whole milk | Can use almond milk for a dairy-free version |
| Instant espresso powder | Try medium roast coffee for a milder taste |
| Granulated sugar | Coconut sugar for a caramel note |
| Egg yolks | For vegan, use flax eggs (1 flax egg = 1 tbsp flaxseed meal + 2.5 tbsp water) |
| Unsalted butter | Replace with vegan butter for a dairy-free option |
Step-by-Step Instructions
Combine the Milk and Espresso: In a medium saucepan over medium heat, combine the whole milk and instant espresso powder. Stir continuously until steaming and the espresso fully dissolves—this should take about 3-4 minutes. Be careful not to let the milk boil.
Whisk the Egg Mixture: In a separate bowl, whisk together the egg yolks, granulated sugar, and cornstarch until the mixture becomes pale and slightly thickened—about 2 minutes of whisking will do.
Combine the Mixtures: Slowly pour the warm milk mixture into the egg mixture while whisking constantly. This step is crucial to avoid scrambling the eggs!
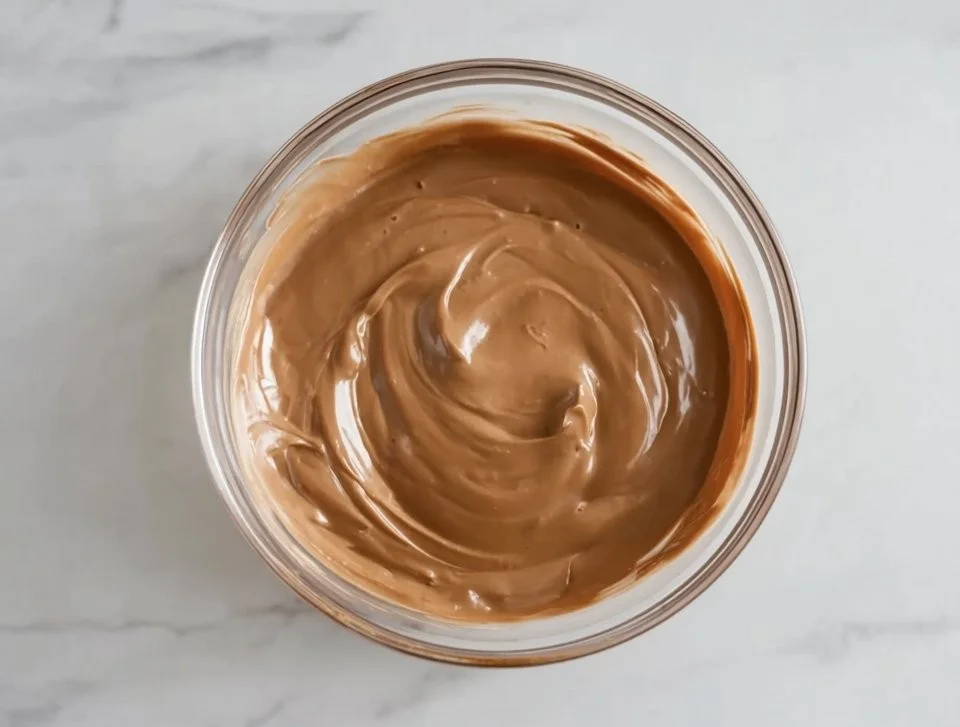
Cook Until Thickened: Return the combined mixture to the saucepan and cook over medium heat, stirring continuously. Keep an eye on it, as it will begin to thicken—about 4-5 minutes. When it coats the back of a spoon, you’re good to go!
Add Butter and Vanilla: Remove from heat. Stir in the unsalted butter and vanilla extract until fully incorporated.
Chill the Mixture: Press plastic wrap directly onto the surface of the filling to prevent a skin from forming. Chill in the refrigerator for 1 to 2 hours to firm it up.
Fold in Whipped Cream: Once chilled, gently fold in the whipped heavy cream until everything is fully combined and fluffy—this will add lightness to your filling.
Chef’s Tips:
- If you notice lumps in your mixture, don’t panic—just strain it through a fine mesh sieve after cooking!
- Always whisk vigorously while combining hot mixtures with eggs to ensure a smooth texture.
Expert Tips & Tricks
Ingredient Quality Matters: Using fresh, high-quality ingredients will make a noticeable difference in flavor. Treat yourself to some wonderfully fragrant espresso powder.
Storage Recommendations: This filling can easily be covered and stored in the refrigerator for up to 3 days or frozen for up to a month (just be sure to thaw in the refrigerator before using).
Make-ahead Instructions: Plan to make this filling a day in advance to save time on baking day. Its flavors deepen overnight!
Troubleshooting: If your filling doesn’t thicken up as expected, don’t worry! Just return it to the heat and stir for a bit longer. If it’s too thick, thin it with a splash of milk before folding in the whipped cream.
Flavor Combinations: Want to jazz it up a bit? Try adding a splash of your favorite liqueur, like coffee liqueur or chocolate liqueur, during the butter stage for an adult twist.
For the Best Result: Ensure your cream is properly whipped to soft peaks. This adds airiness and prevents it from deflating your filling.
Serving Suggestions
This espresso cake filling is best when paired with a rich chocolate cake or vanilla sponge. Consider serving it with a dollop on classic desserts like profiteroles or layered in trifles for a café-style treat. For presentation, drizzle a bit of chocolate sauce or a sprinkle of cocoa powder over the top for that professional finish. This filling is perfect for birthdays, brunches, or any occasion where you want to impress!
Variations & Substitutions
Flavored Versions: Experiment with flavors! Try hazelnut for a nutty twist, or incorporate cinnamon for a warm, spiced version.
Dietary Adaptations: Make it gluten-free by ensuring your cornstarch is certified gluten-free. For a vegan option, replace eggs with a flax egg mixture and use coconut cream instead of heavy cream.
Seasonal Variations: During the holidays, add a dash of peppermint extract for a festive touch or some pumpkin spice for a fall-inspired filling.
Nutrition & Storage Info
- Prep Time: 15 minutes
- Cook Time: 10 minutes
- Total Time: 1 hour 25 minutes (includes chilling)
- Yield: Approximately 2 cups, enough for 2-3 layer cakes
- Estimated Calories per Serving: 150 calories
- Storage Instructions:
- Room Temperature: Not recommended
- Refrigerator: Store in an airtight container for up to 3 days.
- Freezer: Freeze in an airtight container for up to 1 month.
FAQ SECTION
Can I use coffee instead of espresso powder?
- Yes, but the flavor will be less intense. If using brewed coffee, reduce the amount of milk accordingly.
How can I make it dairy-free?
- Substitute the whole milk with almond or coconut milk, and use vegan butter and coconut cream for the whipped cream.
What is the best way to reuse leftover filling?
- It’s wonderful as a dip for fresh fruit or as a filling for pastries and cookies.
Can I warm the filling before using it?
- Yes! Just heat it gently on the stove, stirring constantly until it’s warm, not hot.
What cakes pair best with this filling?
- Chocolate, vanilla, and even red velvet cakes work beautifully with espresso cake filling.
Is this filling suitable for piping?
- Absolutely! Once chilled, it can be piped beautifully onto cupcakes or layered in desserts.
How can I thicken the filling if it doesn’t set?
- If it doesn’t thicken as expected, return it to the heat and stir in a little more cornstarch mixed with a bit of milk.
Can I add other flavors to the filling?
- Definitely! Adding extracts like almond or flavored liqueurs can take it to the next level.
What if I want a sweeter filling?
- Feel free to adjust the sugar according to your taste preference.
Can I skip the whipped cream in the recipe?
- You can, but the whipped cream adds lightness. If you prefer a denser filling, simply skip this step!
Conclusion
This espresso cake filling is more than just a recipe; it’s a beloved family tradition that can create moments of joy and deliciousness. I encourage you to try making your own version and share the experience with your loved ones. Trust me, once you dive into the world of homemade espresso cake filling, you won’t want to go back to those store-bought versions. Have fun exploring different variations and let me know how it turns out! And don’t forget to check out my other related recipes on the blog for more baking inspiration!

Espresso Cake Filling
Ingredients
Method
- In a medium saucepan over medium heat, combine the whole milk and instant espresso powder. Stir continuously until steaming and the espresso fully dissolves (about 3-4 minutes). Be careful not to let the milk boil.
- In a separate bowl, whisk together the egg yolks, granulated sugar, and cornstarch until the mixture becomes pale and slightly thickened (about 2 minutes).
- Slowly pour the warm milk mixture into the egg mixture while whisking constantly to avoid scrambling the eggs.
- Return the combined mixture to the saucepan and cook over medium heat, stirring continuously until thickened (about 4-5 minutes). When it coats the back of a spoon, it’s done.
- Remove from heat and stir in the unsalted butter and vanilla extract until fully incorporated.
- Press plastic wrap directly onto the surface of the filling to prevent a skin from forming. Chill in the refrigerator for 1 to 2 hours.
- Once chilled, gently fold in the whipped heavy cream until fully combined and fluffy.