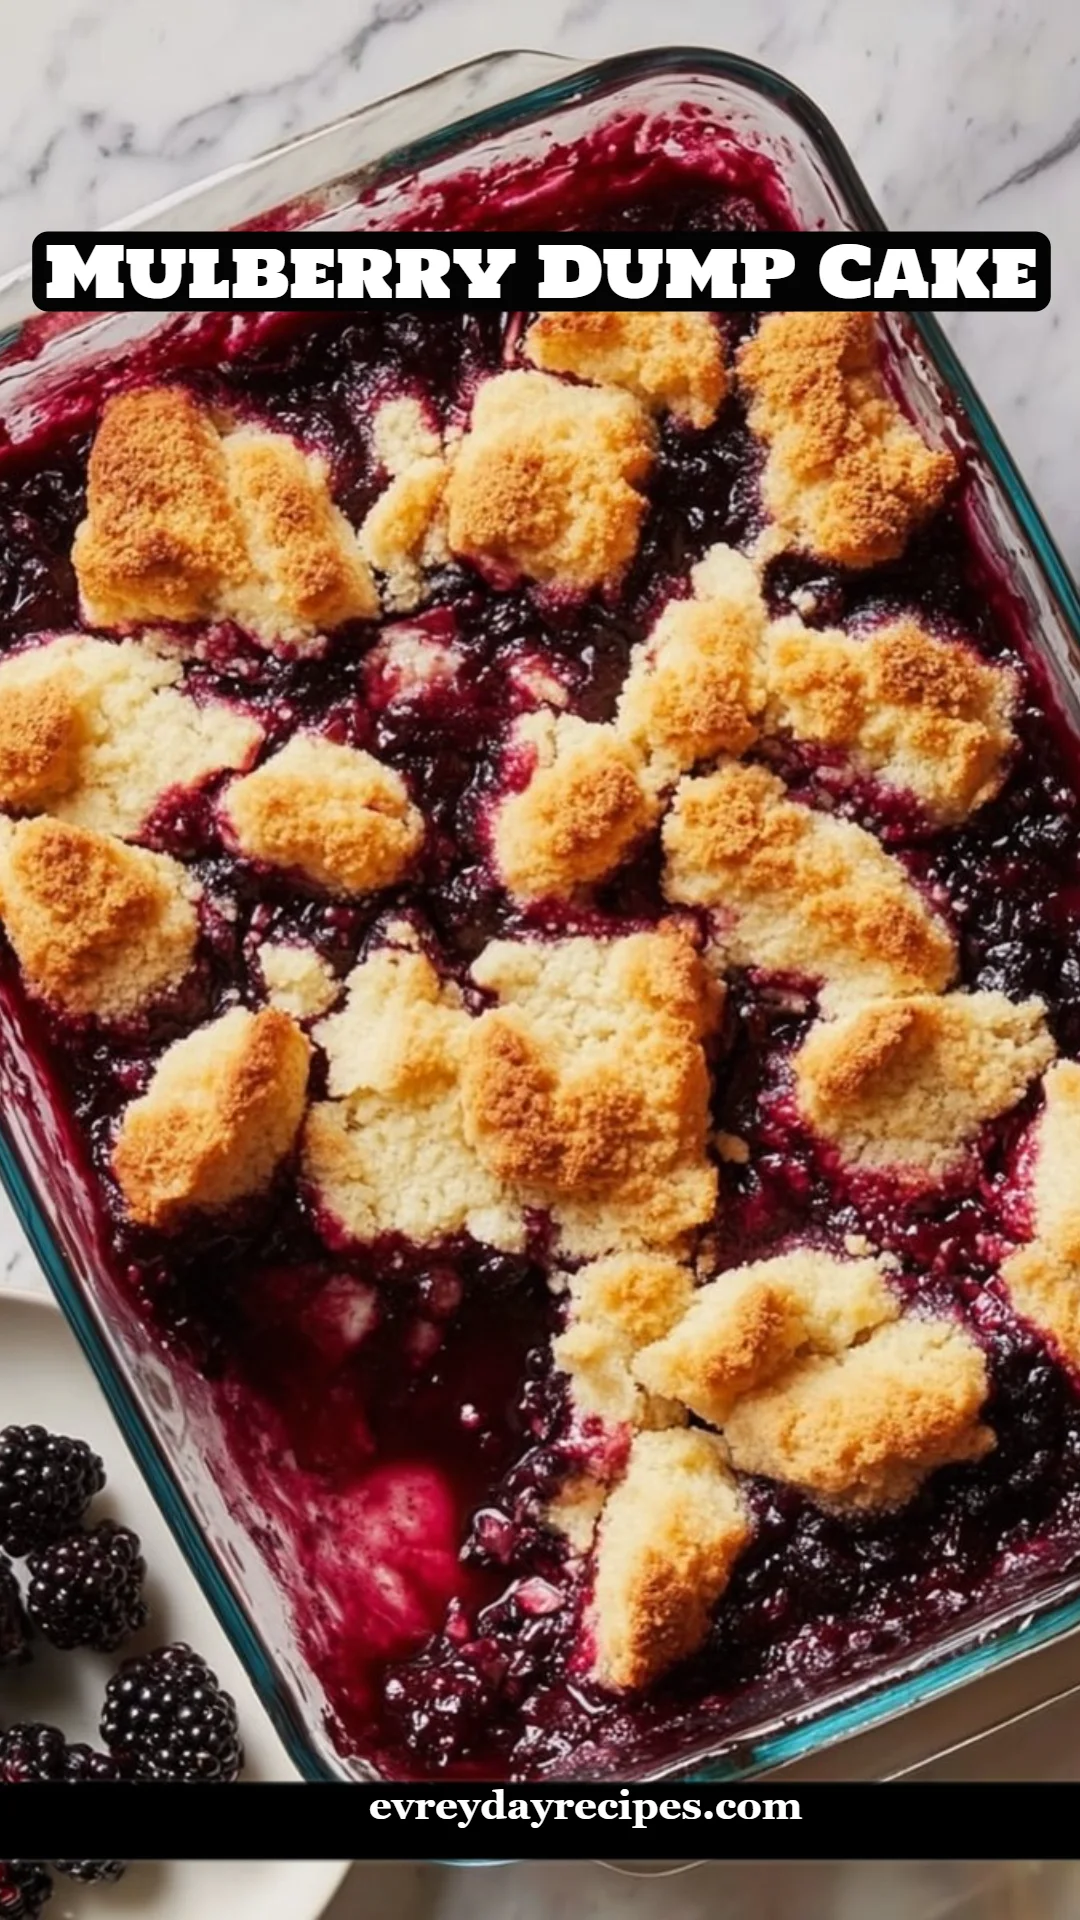
Delightfully Different: Mulberry Dump Cake That’s Always a Hit
Introduction
Have you ever been overwhelmed by a kitchen disaster, only to have it transform into a family favorite? I still remember the story of my first attempt at making a traditional berry cobbler, which ended up a soggy mess. Little did I know that moment would lead me to create my now-famous Mulberry Dump Cake! This sweet and simple dessert is thrown together in no time and always manages to impress.
What makes this recipe special is the way it captures the essence of summer, even when you’re using frozen mulberries. The juicy, sweet-tart filling paired with a golden, crumbly topping evokes cherished family memories of gathering fresh berries on warm afternoons, sharing laughter, and creating delicious treats. Unlike typical dump cakes, this recipe balances flavors and textures beautifully, resulting in a dessert that’s just as delightful to the eyes as it is to the palate.
In this post, I’ll walk you through the steps to create your very own Mulberry Dump Cake, complete with tips for perfecting this comforting family classic. Get ready to delight your taste buds and create lasting memories in your kitchen!
What Are Mulberry Dump Cakes?
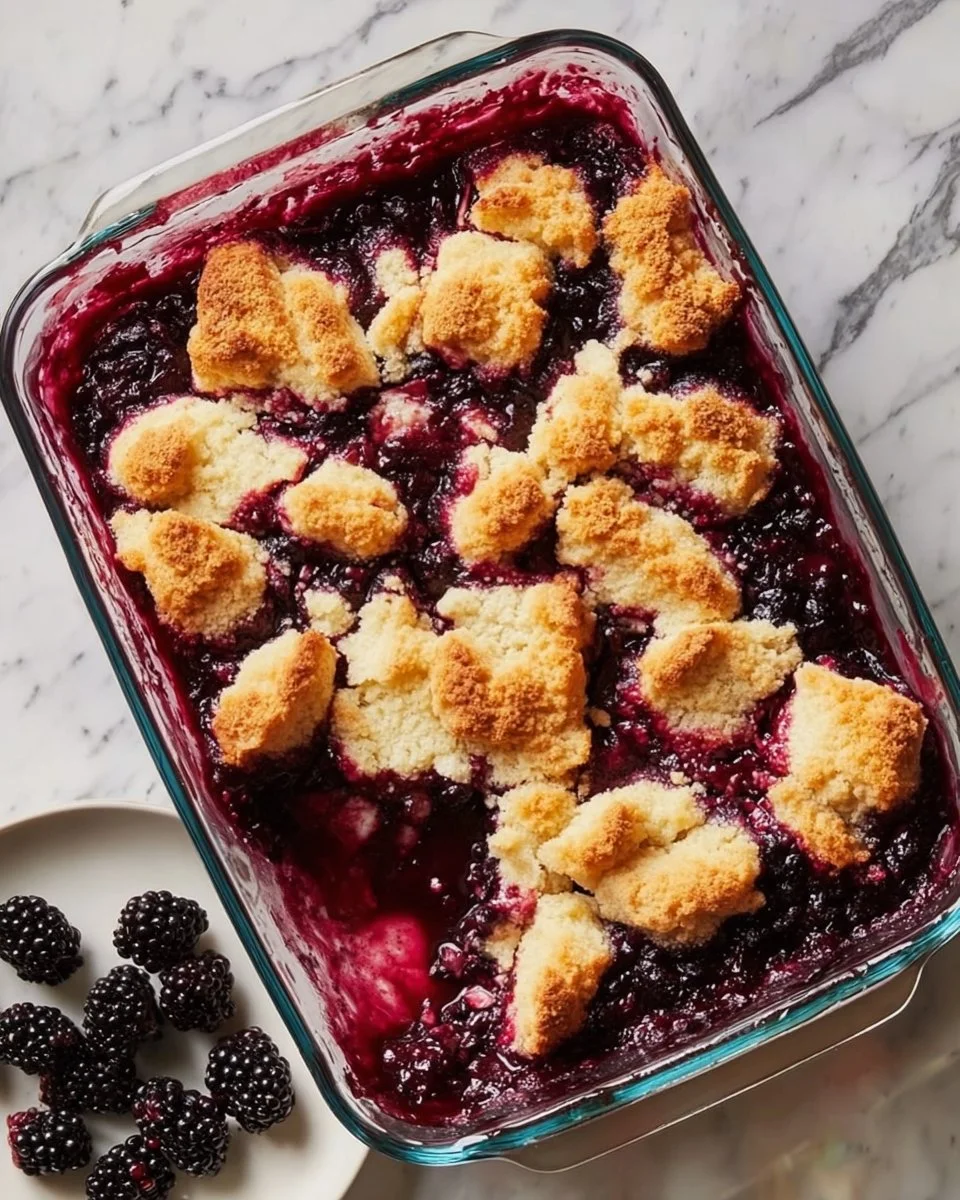
Mulberry Dump Cakes have a charming origin rooted in the art of simple home baking. This dessert is a brilliant blend of fresh or frozen mulberries, sugar, and a convenient cake mix that marries beautifully in the oven. When baked, the cake’s top becomes a golden crust while the bottom transforms into a luscious, bubbling berry filling.
The flavor profile is a delightful marriage of sweet and tangy, with a hint of nostalgia in every bite. The textures are striking; the golden topping provides a contrast to the soft, gooey fruit beneath. You’d want to serve this warm, topped with a scoop of vanilla ice cream for an extra layer of bliss.
So when is the best time to whip up this magical dessert? Any occasion! It’s perfect for summer picnics, celebrations, or even as a cozy treat just for you after a long day.
Why You’ll Love This Recipe
Simplicity and Ease: One of the highlights of the Mulberry Dump Cake is how easy it is to make. With minimal prep and no fancy techniques required, all you need is the ability to mix. If you can pour ingredients into a dish, you can make this cake!
Affordable Ingredients: Unlike many desserts that might require a pantry full of specialty ingredients, this recipe is light on the wallet. You probably already have most of the items in your pantry!
Customizable to Your Taste: Whether you want to mix in some nuts for a crunchy texture, replace mulberries with cherries, or even sprinkle a hint of cinnamon for warmth, the variations are endless. This cake can truly adapt to your preferences or what you have on hand!
Better than Store-Bought: Sure, you can grab a dessert from the store, but nothing compares to the homemade touch. The freshness of this Mulberry Dump Cake, combined with the love baked into it, is something you simply can’t find in a store-bought product.
Ideal for Any Age Group: From kids to grandparents, everyone loves a warm dessert that feels like a hug from the inside out. It’s a guaranteed way to put smiles on faces and create happy memories together.
Ingredients
To make my heavenly Mulberry Dump Cake, you’ll need:
- 4 cups mulberries (fresh or frozen) – If using frozen mulberries, no need to thaw.
- 3/4 cup granulated sugar – Sweetness that balances well with the tartness of the berries.
- 1 tablespoon lemon juice – Brightens up the flavors.
- 1 teaspoon vanilla extract – A warm aromatic touch.
- 1 box (15.25 oz) yellow cake mix – The foundation for this easy recipe.
- 1/2 cup unsalted butter, melted – Adds great richness.
- 1/2 cup milk – Helps form the perfect topping texture.
- 1/2 teaspoon cinnamon (optional) – For a warm, cozy aroma.
- Pinch of salt – Enhances the overall flavor without overpowering the sweetness.
- 1/2 cup chopped pecans or walnuts (optional) – A delightful crunch!
- 1/2 teaspoon almond extract (optional) – A lovely nutty addition.
Ingredient Notes:
- Mulberries can often be found in farmers’ markets, or you could even forage them in the wild during the summer. If they aren’t available, other berries such as blackberries and blueberries work beautifully too!
- Using high-quality vanilla extract and fresh fruits will elevate your cake’s flavor.
- If you need to make this gluten-free, substitute the cake mix with a gluten-free option.
Prep Notes: Ensure your butter is at room temperature for easy mixing.
Step-by-Step Instructions
1. Prepare Oven and Dish
- Preheat your oven to 350°F (175°C). Lightly grease a 9×13-inch baking dish with butter or non-stick spray to prevent sticking and ensure easy serving.
2. Mix Fruit Base
- In a large bowl, gently combine the mulberries, sugar, lemon juice, and vanilla extract. Stir carefully to keep the berries intact while coating them in sweetness.
3. Add Fruit to Dish
- Spoon the mulberry mixture into the prepared baking dish, spreading it into an even layer to help the fruit cook uniformly.
4. Add Cake Mix
- Open your yellow cake mix and sprinkle it evenly over the mulberries. Do not stir! This creates the layered texture that’s so distinctive to dump cakes.
5. Add Liquid Ingredients
- Drizzle the melted butter evenly across the cake mix. Then, slowly pour the milk over the top to moisten the mix, creating a soft, crumbly topping as it bakes.
6. Add Optional Toppings
- If desired, sprinkle cinnamon, nuts, or almond extract over the top for an added flavor dimension.
7. Bake
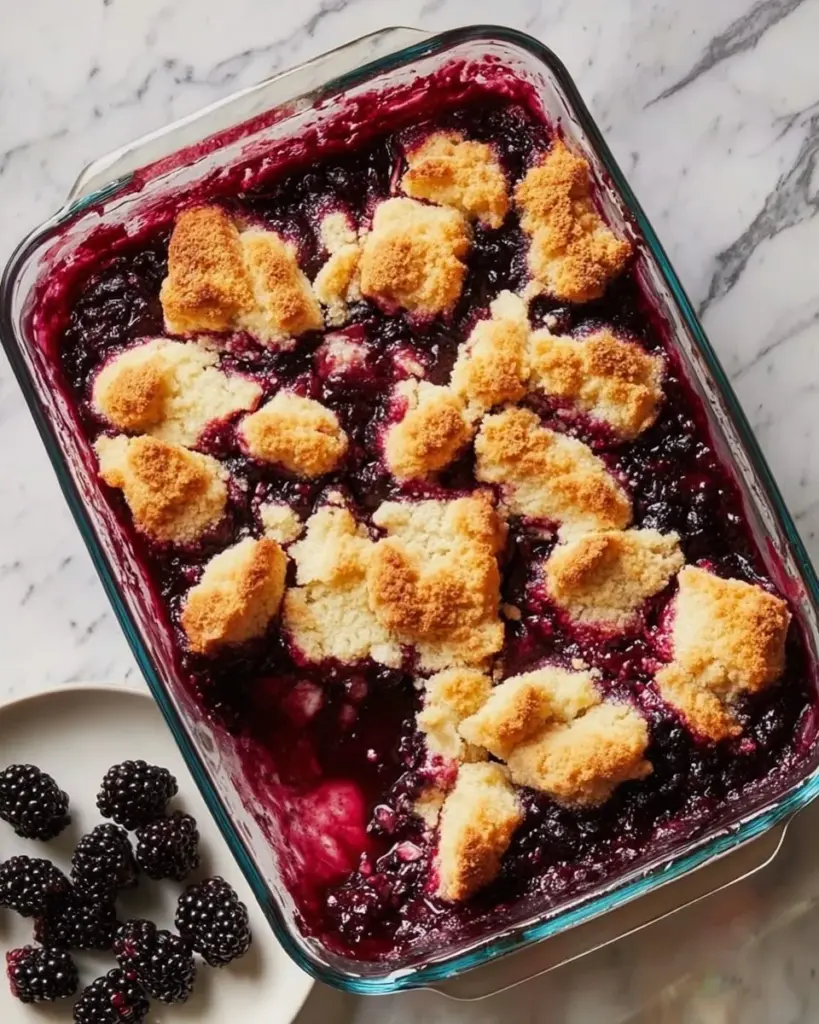
- Place your dish in the oven and bake for 45 to 55 minutes, or until the top turns a luscious golden brown with edges bubbling with sweet fruit juices.
8. Cool Before Serving
- Allow the cake to cool for 10 to 15 minutes. This step thickens the filling slightly, while still keeping it warm and inviting.
Chef’s Tip: If you notice the edges cooking faster than the middle, cover the dish loosely with aluminum foil for the last 10 minutes of baking.
Expert Tips & Tricks
Storage Recommendations: Keep any leftovers in an airtight container. It’ll last up to 3 days in the fridge. Alternatively, you can freeze it for up to 3 months.
Make-Ahead Instructions: You can prepare the fruit mixture a day in advance and store it in the fridge until you’re ready to assemble the Dump Cake.
Troubleshooting Common Problems: If your cake isn’t as bubbly as you’d like, it might need a tad more baking time. Each oven can vary. Keep an eye on the color and aroma!
Storing Leftovers: Warm up for a few seconds in the microwave for a comforting treat anytime, or top with ice cream for an exquisite indulgence.
Flavor Variations: Swap the mulberries for peaches or apples for a seasonal twist.
Double Batch: This recipe can easily be doubled for larger gatherings; just adjust baking time slightly if you’re using two pans.
Serving Suggestions
Mulberry Dump Cake is delicious on its own but truly shines alongside a scoop of vanilla ice cream or a dollop of whipped cream. For a lovely presentation, consider serving it in individual ramekins topped with ice cream and garnished with a sprig of mint.
This dessert is perfect for family gatherings, potlucks, or summer barbecues. It’s a dessert that feels like a warm hug on a cool evening – comfort food at its best!
Variations & Substitutions
- Flavor Combinations: If you’re looking to mix it up, try combining mulberries with raspberries or blackberries for a mixed berry dump cake.
- Dietary Adaptations: For gluten-free versions, use certified gluten-free cake mix and ensure your ingredients are free from cross-contamination.
- Seasonal Variations: During autumn, feel free to mix in some tender sautéed apples for a seasonal twist, or brighten with citrus zest in the spring.
Nutrition & Storage Info
- Prep Time: 10 minutes
- Cook Time: 45-55 minutes
- Total Time: 1 hour, depending on your oven.
- Yield: 8-10 servings
- Estimated Calories: Approximately 280 calories per serving (though this will depend on your specific ingredients and portion sizes).
Storage Instructions: Store any leftovers at room temperature for 1 day, in the fridge for up to 3 days, or freeze for up to 3 months.
FAQ Section
1. Can I use other fruits instead of mulberries?
Absolutely! Berries like blackberries, blueberries, or even peaches can be substituted for the mulberries.
2. Can I make this cake gluten-free?
Yes, use a gluten-free yellow cake mix, and check all your other ingredients for gluten-free certification.
3. How can I adjust the sweetness?
Feel free to adjust the sugar based on your taste preference. If the work with tart mulberries, you might want to retain more sugar.
4. Should I thaw frozen mulberries?
No need to thaw them! You can use them straight from the freezer for a more convenient option.
5. What can I do if I run out of cake mix?
You can make a quick homemade cake topping using flour, sugar, baking powder, and a touch of salt!
6. Can I make this dump cake ahead of time?
Yes! You can prepare the fruit mixture a day ahead; just combine all ingredients and store in the fridge.
7. What can I serve with my Mulberry Dump Cake?
It pairs wonderfully with vanilla ice cream, whipped cream, or a drizzle of caramel sauce!
8. What’s the best way to store leftovers?
Keep it in an airtight container in the fridge for up to 3 days or freeze for longer storage.
9. My cake is too gooey in the center, what went wrong?
It may need a bit more baking time. Check for a golden-brown color on top and bubbling at the edges.
10. Can I add spices like nutmeg or ginger?
Definitely! Adding additional spices can give your cake an extra flavor kick depending on your taste preferences.

Conclusion
This delightful Mulberry Dump Cake brings comfort and joy to any occasion, with each bite transporting you back to carefree summer days filled with laughter and family. It is easy, customizable, and downright delicious. I encourage you to dive into this recipe and try it out for yourself!
I can’t wait to hear your feedback – did you add your own twist? Did you enjoy it with friends and family? Share your thoughts in the comments below! And don’t forget to check out my other seasonal dessert recipes on the blog to keep the joy of cooking going!
Mulberry Dump Cake
Ingredients
Method
- Preheat your oven to 350°F (175°C). Lightly grease a 9×13-inch baking dish with butter or non-stick spray.
- In a large bowl, gently combine the mulberries, sugar, lemon juice, and vanilla extract.
- Spoon the mulberry mixture into the prepared baking dish, spreading it into an even layer.
- Sprinkle the yellow cake mix evenly over the mulberries without stirring.
- Drizzle the melted butter evenly across the cake mix and slowly pour the milk over the top.
- Optionally, sprinkle cinnamon, nuts, or almond extract for added flavor.
- Place the dish in the oven and bake for 45 to 55 minutes until the top is golden brown.
- Allow the cake to cool for 10 to 15 minutes before serving.